
 EN
The Hidden Cost of Inconsistent Crimps
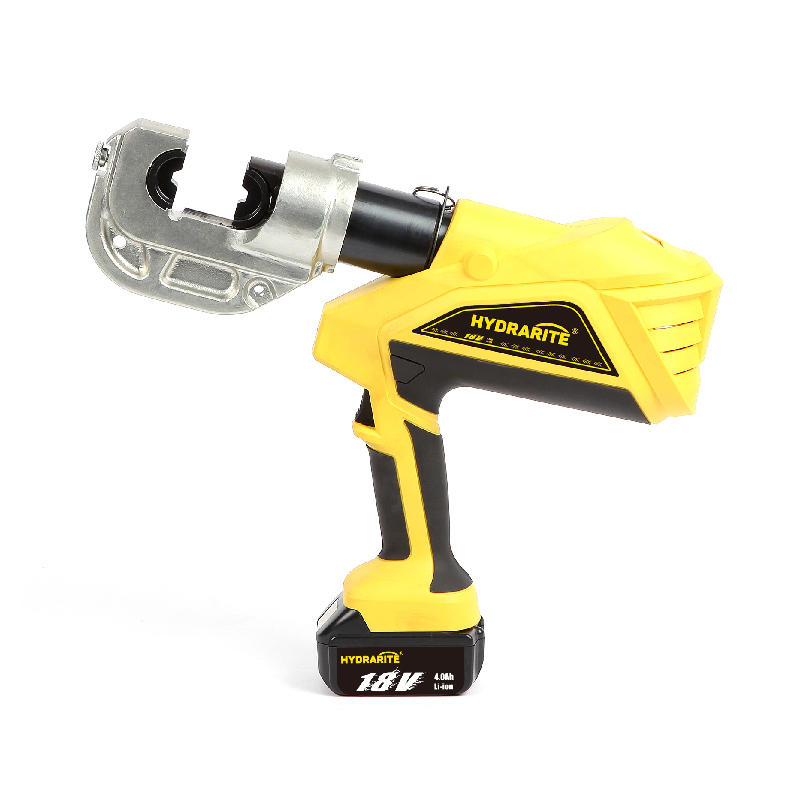
A utility contractor working on a 33 kV feeder replacement in the Pacific Northwest ran into a problem that didn't show up until three months after the job was signed off. The terminations all passed the visual inspection. Pull tests met the minimum requirements. But during a routine thermal imaging survey, five of the thirty-six crimped connections showed hot spots—temperature differentials of more than 15°C above the adjacent cable. Investigation traced the issue back to one operator who had been using a slightly worn die set on a manual crimper. The crimps looked fine from the outside. Inside, the compression wasn't uniform, and the resulting high-resistance connections were slowly cooking themselves.
The fix cost the contractor nearly $18,000 in labor, materials, and outage time. And it all started with a die that should have been replaced weeks earlier.
Getting the Die Selection Right the First Time
Die selection isn't complicated, but it's where many quality problems start. Every terminal and connector has a specified die profile—hexagonal, indent, or W-style—that matches its barrel geometry. Using the wrong profile means the compression force doesn't distribute evenly around the conductor. The result? A connection that might pass a pull test but fails under thermal cycling or vibration.
The size matters just as much as the shape. Dies are marked for specific conductor ranges, usually in AWG or mm². But here's the catch: strand count affects how the conductor behaves under compression. A flexible cable with many fine strands compresses differently than a solid or compact-stranded conductor of the same nominal size. The die that works perfectly for one may over-crimp or under-crimp the other. Checking the connector manufacturer's die recommendation against the actual cable being used takes thirty seconds. Skipping that check can cost days of troubleshooting down the line.
Crimp Height: The Measurement That Tells the Truth
Visual inspection catches obvious problems—off-center crimps, cracked barrels, or insulation that's been pinched. But visual inspection alone doesn't confirm a quality connection. The critical metric is crimp height: the finished height of the crimped barrel measured with a micrometer.
Industry standards like USCAR-21 specify crimp height tolerances based on conductor size. For conductors larger than 8.0 mm², the tolerance is ±0.10 mm. For smaller gauges, it tightens to ±0.05 mm or even ±0.03 mm. Those are tiny numbers, but they represent real differences in compression quality. A crimp that's too tall hasn't been compressed enough—air gaps remain, corrosion can start, and resistance is higher than it should be. A crimp that's too short means the barrel has been over-compressed, potentially reducing the conductor's cross-sectional area and creating a mechanical weak point.
| Crimp Height Condition | Likely Cause | Field Consequence |
|---|---|---|
| Above spec (too tall) | Wrong die, worn die, insufficient tool force | High resistance, overheating, eventual failure |
| Within spec | Correct die, proper tool maintenance, good technique | Reliable gas-tight connection, long service life |
| Below spec (too short) | Over-compression, wrong die, excessive force | Reduced conductor cross-section, mechanical weakness |
Pull testing has its place, but it's destructive and can't be performed on every connection. Crimp height measurement is non-destructive, quick, and gives real-time feedback on whether the process is under control. A micrometer with a blade and point—not a standard flat anvil—gives accurate readings that account for any flash or deformation on the barrel surface.
Die Alignment and Tool Maintenance
Even with the right die set, alignment determines whether the compression is uniform. Misaligned dies produce crimps that are tighter on one side than the other. The connection might hold mechanically, but the electrical path isn't consistent across the full barrel circumference.
Common causes of misalignment include wear on the tool's jaw pivot points, improper die installation, and using mismatched die halves from different sets. Regular inspection catches these issues before they affect production. A simple check: install the dies, close the tool on a test piece, and examine the resulting crimp for symmetry. Any visible difference in compression depth from one side to the other means something's off.
Tool maintenance matters more than many shops acknowledge. Hydraulic crimpers need clean oil, proper fluid levels, and periodic seal replacement. Manual crimpers need lubrication on pivot points and regular checks for handle play. A tool that's been dropped or knocked around can develop misalignment that isn't visible to the naked eye but shows up in every crimp it makes.
Workpiece Preparation: The Overlooked Variable
Perfect tooling won't fix a poorly prepared cable. Strip length matters—too much exposed conductor and the barrel doesn't fully cover the strands, leaving a gap that invites corrosion. Too little and the insulation gets caught in the crimp, preventing full compression of the conductor.
The strip should leave enough bare conductor to fill the barrel completely, with the insulation just touching the barrel's insulation support. Any nicks or cuts in the conductor strands from the stripping process weaken the mechanical strength of the connection. A damaged strand might break during crimping or fail under vibration later.
Cleanliness also plays a role. Oxidation on aluminum conductors needs to be removed before crimping—wire brushing or abrasive cleaning breaks through the oxide layer so the compression can establish a gas-tight seal. Copper conductors are less sensitive but still benefit from clean, bright surfaces. Dirt, grease, or moisture trapped in the crimp become sites for future corrosion.
Process Control and Operator Training
Consistency doesn't happen by accident. It requires a repeatable process that every operator follows the same way. That means standardized die selection, standardized strip lengths, standardized crimp height measurement, and standardized documentation.
First-article inspection—checking the first crimp of each batch or shift—catches drift before it becomes a pattern. If the crimp height is at the high end of the tolerance range, the dies might be wearing out. If it's at the low end, the tool might need adjustment. Catching these trends early means making small corrections instead of dealing with widespread rework.
Training matters as much as tooling. An operator who understands why crimp height matters, how die alignment affects the connection, and what to look for in a finished crimp produces better work than one who just follows steps without knowing the reasoning behind them. Cross-training multiple operators on the same equipment builds redundancy and ensures consistent quality when someone's out sick or on vacation.
When Crimps Fail and What to Learn From Them
Every shop has had a crimp fail inspection at some point. The useful response isn't to blame the operator or the tool—it's to figure out what went wrong and fix the system that allowed it. Was the die worn beyond its service limit? Was the operator trained on the correct strip length? Was the tool properly maintained?
Documenting failures and their root causes builds a knowledge base that prevents repeat issues. A simple logbook or digital record of crimp height measurements, die changes, and maintenance actions creates a trail that shows when things started drifting and what brought them back under control.
For operations that demand reliable, repeatable crimping performance across high-volume production or field service, equipment from manufacturers like Taizhou Ruiqi Tools provides the foundation. Consistent manufacturing tolerances and rigorous quality control at the factory level translate to fewer variables for the operator to manage on the job.
Table of Contents
- The Hidden Cost of Inconsistent Crimps
- Getting the Die Selection Right the First Time
- Crimp Height: The Measurement That Tells the Truth
- Die Alignment and Tool Maintenance
- Workpiece Preparation: The Overlooked Variable
- Process Control and Operator Training
- When Crimps Fail and What to Learn From Them